Friday, October 11, 2013

A "Spooky" Halloween Classroom

It's officially October now...which means Halloween is just around the corner! I love holidays, especially Halloween. I am currently teaching in South Korea as an English teacher so I wanted to teach my bring Halloween to their classroom. Halloween is not celebrated in Korea. The kids are slowly learning about what Halloween is and what it is about but they will never truly understand what it is like to dress up on Halloween day as a kid and go trick-or-treating. That is why I have decided to bring a bit of Halloween to them. This is my second year decorating my classroom and this time I added a few more things. I love seeing my student's reactions when they come into my classroom and see all the decorations. They run around screaming asking what everything is. It is absolutely adorable and exactly the reason why I do what I do.

Here is how I decorated my classroom. I don't have many resources to buy a lot of Halloween themed decorations so I used what I got. It is kind of simple but it turned out cute and the kids loved it. I hope you can get inspired and use a few of these ideas for your own classroom or home.

My Classroom:


Halloween Garland: 


I found this super cute Halloween Spook Banner from HERE and decided to create one to put on my desks. My student's love looking at them and naming each item. The only item they all get stuck on is the candy corn. They don't have that over here so they have no idea what it is.


I wanted to make a ghost garland so I looked at my baskets of craft supplies to see what I had and I found bubble wrap, plastic rain poncho, sting, and fishing wire. So I decided that I was going to make little ghost garlands. I love how it turned out! Here is how I made mine.

Take your ghost material (it could be anything: fabric, plastic table cover, rain poncho...) and cut it into a square. The size of the square depends on how big you want your ghosts to be. Now take your bubble wrap (you could also use a Styrofoam ball) and create a smaller square. You will roll it up to form a ball for the head. Now wrap the ghost material over the head and secure with a ribbon. You can now either keep it like that and have a center piece of ghosts or do what I did and attach it to string to make a cute little ghost garland.

Bats Galore!


It's not Halloween without bats! String up some bats on a mantel or put them on the wall. It will transform it to a spooky Halloween setting. HERE is a great stencil and idea from Martha Stewart.

Spooky Silhouettes! 


I also got this idea and stencil from Martha Stewart. You can find it from HERE.


HERE are some more great silhouettes for you to use for your Halloween decor.

Friendly Ghosts


I found this cute and creative way to create paper ghosts from HERE.


I found this idea from HERE. They used party streamers to wrap there door but because I had to work with what I got I decided to create my own mummy out of white paper and crayons. It turned out great, I love it!

So that was my Halloween inspired classroom. I can't wait till Halloween gets here and I can celebrate with my students. 

I hope you have a wonderful and safe Halloween! Have fun crafting!

Friday, September 13, 2013

DIY Group Halloween Costumes

I love any excuse for dressing up, from getting dressed up for a girls night out or for a holiday. That's what makes Halloween one of my favorite holidays, cause it is acceptable to dress up, be creative/ crafty, and have lots of fun. 

In university my friends and I did a group costume for Halloween. Here is what we did. It was lot's of fun and they all turned out so cute. I hope these can help inspire you to create an awesome Halloween costume. So grab a few friends and start crafting! 


Power Puff Girls
For this costume all you need is blue, pink, and green dresses, black belts (we used black ribbon for this part), white tights, and black flats. For blossom (the middle girl) you will need a big red bow. So simple and fun. Sure to be the cutest girls at the party. 

The Chipettes 

Eleanor, Brittany, Jeannette
This costume was fun! We went as Alvin and the Chipettes. We even got our friend to join us to be Alvin for this costume. For this costume we went to goodwill and found outfits that were similar to the cartoon. I think we did a pretty good job with it. This one is also a pretty great group costume and will for sure to win at a costume contest. 


The Wizard of Oz

The Lion, Scarecrow, and Tin Man
"Lions, Tigers, and Bears Oh My!" The Wizard of Oz is a perfect group costume. We did our own rendition of this costume. My friend created her tin man costume our of cardboard and a kitchen funnel. So creative. 

So if you need a group costume for this Halloween... here are three really great ideas for you and your friends.

 Have a fun Crafty and Happy Halloween!


Saturday, August 31, 2013

DIY Christmas Candy Bar Holders

I celebrated Christmas in July with some friends this past month. As a little party favor/ Christmas gift, I created these cute Christmas Candy Bar Holders. They were so easy to make and a big hit at the party. It's great for stocking stuffers, party favors, or gift cards, or gift tags. Endless possibilities with this project.

Have Fun Crafting!

DIY Bow & Pearl Bracelet

Here is another simple and cute bracelet that I made as a gift for a friend. I saw this on Pinterest and decided to try it out. Here is what it looked like.


This project is so simple to make. I used a pearl necklace and a scrap of fabric that I had in my craft drawer. So if you have an old necklace that you do not wear or see a cheap one in an accessory store go ahead and pick it up and re-craft it to this cute and simple bracelet!

You can find the tutorial for it here: DIY Pearl and Bow Bracelet

Have fun crafting!

Sunday, August 25, 2013

DIY Leather Hex Nut Bracelet

I love giving gifts and I especially love making them. I love being able to use my craftyness into something special and make things for friends that are special to me. I had some Hex Nuts in my drawer of crafts, so I thought I would find a cute project that I could use them.

I found this great tutorial that created a braided hex nut bracelet here: DIY Braided Hex Nut Bracelet 

Here is my version of the bracelet. I used leather instead of twine and got a different outcome. I like how it turned out. (Makes it more unique and a Justine original ^^)


Have fun Crafting!

DIY Wall Decor/ Photo Booth Backdrop

While I was watching 'HGTV: Design Star' I got inspired/ motivated to do a little decorating in my own home and started looking on Pinterest to see what I could do. I really like how cute photo booth backdrops are and decided why not have it as my wall decor also. I found some really great ideas but here are the ones I decided to recreate.

For the first wall I used this idea: DIY Geometric Photobooth Party Backdrop


The best part is that you can also use it for a photo booth wall. So next time you have a party you don't have to worry about that part.


For my second wall I used a mixture of paper fans and tissue paper flowers. 


To create the paper fans you can look at this tutorial here: DIY Paper Fans

To create the tissue paper flowers you can get the tutorial from here: DIY Tissue Paper Flowers

For my third wall I wanted to use some of my pictures so I came up with this.


To create this look, I used double sided tape and cut out pieces of colored paper to the exact size of the tape to make a cute and fun border for my pictures. You could also do this with Washi tape. This look is great cause you can use a variety of material from newspapers, fabric, glitter, to anything for a very inexpensive project. 

So the next time you get bored with your decor, look in your craft drawer and see what you got. You can pretty much do anything with paper and creativity.

Have fun crafting!

Tuesday, July 2, 2013

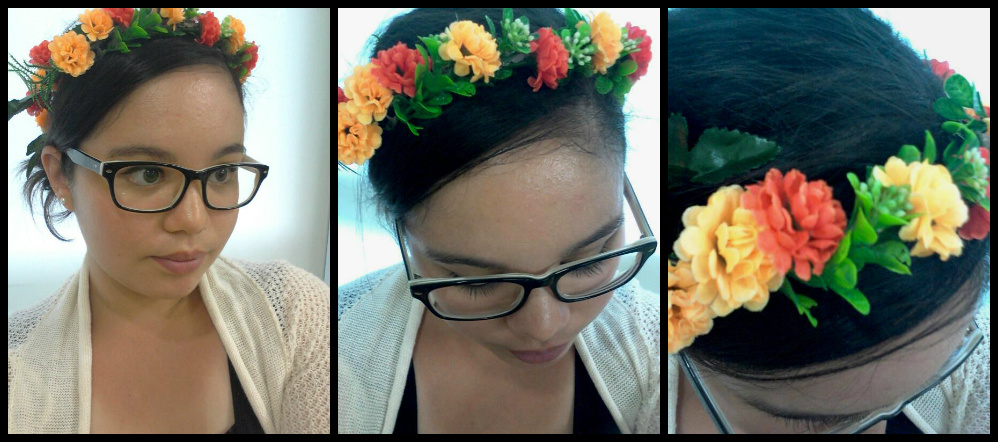
DIY Lana Del Ray Inspired Flower Headbands

Summer is here and so are these flower headbands trend. I have been seeing these headbands lately everywhere and thought they were very cute and stylish.

I found a section with some fake flowers at a store and decided that I was going to try and create some of these Lana Del Rey inspired headbands. 


Here are the fake flowers that I used. 


The first headband I decided to create was this flower crown. I found this great tutorial HERE! In this tutorial, you use wire to make it into a crown. 


I decided to make two different kinds of headbands. Here is the second one I created:


The second headband I created was out of elastic. For this project, I cut out a piece of felt and glued on the flowers to it. I then attached elastic to the back of the felt that measured out to fit my head... and then Presto! A cute summer elastic headband.


If you like to follow a tutorial HERE is another crafter's flower elastic headband.

There are many different ways to create these flower headbands. HERE is another crafter's tutorial (using headbands).

So the next time you see some fake flowers at your local dollar store or crafting store pick some up and turn them into these super cute and stylish headbands!

Happy Crafting!